COA202 Embedded Systems · Gareth Nunns · B526376
Introduction
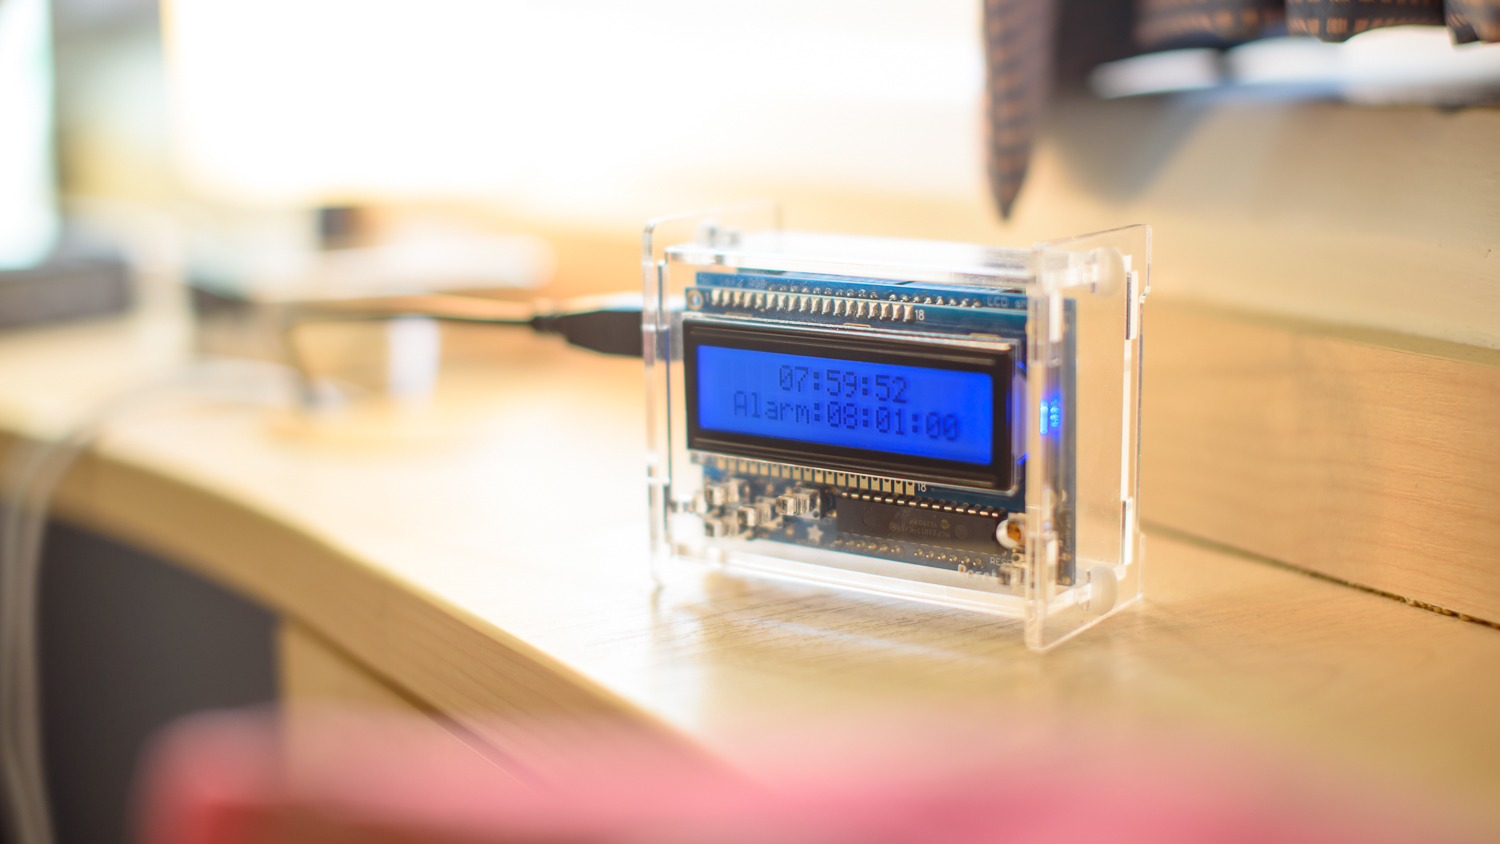
I have created an alarm clock using an Arduino Uno with an Adafruit RGB LCD Shield, with useful functionality:
- Set the current time
- Set the alarm time
- Display the current time
- Turn the alarm on & off
- Snooze the alarm
- Alarm goes off and shows the user a message
- Backlight automatically turns off after a minute
All through the use of the buttons and LCD screen on the device.
Flowchart
The clarity of the implementation description is improved by first showing the flow of the user interface:
This is the core of how the program works - it goes from being idle to being in one of the other states, then reverts to being idle; the instructions also help describe how it moves between states. Each of the states then has its own logic, as explained below in the implementation description.
Implementation Description
Includes
I have included the time library by Paul Stroffregen, to handle the clock section of the assignment. Then also the libraries associated with the shield.
Define & const values
The backlight colours of the LCD screen are defined as found on the Adafruit website.
The different states for the clock to transition between are defined as these:
#define IDL 0
#define SETCLOCK 1
#define SETALARM 2
#define ALARM 3- IDL
- The normal clock display
- SETCLOCK
- Setting the current time
- SETALARM
- Setting the alarm time
- ALARM
- When the alarm is going off
The cursor positions are defined as so:
#define HOURS 0
#define MINS 1
#define SECS 2
Making later code easier to read when referring to which unit of time your are setting.
The lengths of time for various events are defined like so:
const int COLORLEN = 200; // 200 milliseconds for the colours to flash during the alarm going off
const int ALARMLEN = 30*1000; // 30 seconds for the alarm to go off for
const unsigned long SNOOZELEN = 5*60000; // 5 minutes for the snooze
const unsigned long BLIGHTLEN = 60000; // a minute for the backlight to time off
Variables
The maximum value for each unit of time is defined like this const int timeUnits[3] = {24,60,60};, which is then used when setting the alarm time.
The initial state is then assigned to SETCLOCK.
Then the following variables are assigned:
int cursorPos = 0- Set position of the cursor to 0 - HOURS
bool clockSet = 0- Whether the clock has ever been set - initially false as it has not been set
bool alarmSet = 0- Whether the alarm time has ever been set - initially false as it has not been set
bool alarmed = 0- If the alarm is turned on or off - set to off as the alarm has not been set yet
bool snoozed = 0- If the alarm has been snoozed, which hasn’t yet been set - so false to start
char string[16]- To output text to the screen - the display is 16 characters wide
int alarm[3] = {8,0,0}- The alarm time, as
{hours,minutes,seconds}, initially set to 08:00:00 unsigned long alarmStart- To store the
millis()when the alarm goes off - used to see how long the alarm has been going off for unsigned long colorLen- Used to determine when to change the backlight colour when the backlight is flashing when the alarm goes off, storing increments of COLORLEN, as defined above
unsigned long BLStart- Like
alarmStart, stores themillis()so that the backlight can be switched off afterBLIGHTLEN Adafruit_RGBLCDShield lcd = Adafruit_RGBLCDShield()- To write to the LCD screen and change the backlight
uint8_t buttons- For the buttons on the shield
Setup
This initialises the serial connection and screen. The purpose of BLStart = 0; is to set the start point for the backlight automatic switch off timer. A start up message is displayed:
Welcome
Set time & alarm
Which stays on screen for three seconds.
Loop
The main loop of the program works largely on a switch statement, switch (state), changing between the various states, as defined at startup.
IDL
This is the resting state which all the other states revert back to. The logic of the state is outlined below.
From IDL, it will transition to the ALARM state, depending on:
if((hour() == alarm[0] && minute() == alarm[1] && second() == alarm[2] && alarmed) || (alarmStart+SNOOZELEN < millis() && snoozed))This either triggers when the current time is the same as the alarm time, each hour, minute and second is the same value; or when, the snooze period of time has finished.
You wouldn’t want the alarm triggering whilst the clock was in the setting clock or setting alarm states, as this may be an accidental trigger when changing the time.
It will output the appropriate message on the LCD screen, depending on the time of day, with instructions of how to snooze, in case the user had forgotten in their dozed state, e.g.:
 Good Afternoon
Select to snooze
Pressing the up or down button will change the state to SETCLOCK; also if the clock has never been set, which could possibly be the first run through the program, the state will be changed to SETCLOCK - this is unlikely as state is declared as int state = SETCLOCK, but it is a fail safe measure.
Similarly, if the right button is pressed, or the alarm has never been set, it will transition to the SETALARM state
Should none of the previous conditions listed have been met, the current time is generated using this line:
sprintf(string, "%02d:%02d:%02d", hour(),minute(),second());This ensures there are always two digits for each unit, to display times properly, e.g.:
03:21:19
This is then outputted on the centre of the top line of the display.
Below that it either says:
- “Snoozing” if the alarm has been snoozed
- “Alarm: hh:mm:ss” when the alarm is turned on, telling the user the current time the alarm is set for
- “Alarm is off” when the alarm is switched off
SETCLOCK
It is within this state that you can adjust the current time of the alarm clock.
Pressing the up/down buttons will adjust the current unit of time selected. This may affect other values too as they cycle around. adj is set like so:
int adj = (buttons & BUTTON_UP) ? 1 : -1;Then using the adjustTime() function, part of the Time library, change the time by either a positive or negative number of seconds, e.g. when changing the hours:
case HOURS: adjustTime(adj*60*60);Pressing the left/right buttons increments or decrements the cursorPos variable - changing the unit you are adjusting.
The clock is set and moved into the IDL state based on this statement:
if ((buttons & BUTTON_SELECT) || cursorPos > 2)Therefore, when the select button is pressed, or the right button is pressed after adjusting the minutes, it will set the clockSet variable to true and change the state to IDL.
If none of these conditions are met then it will output which unit the user is adjusting, then the current time of the clock on the line below, for example:
Adjust minutes
05:01:00
SETALARM
This state is similar to setting the clock, however you are setting the alarm time.
Again, pressing the up/down buttons will change the unit currently selected; however, it does not cycle around like the time - this is because the user is more likely to be wanting to set a specific time.
Pressing the down button executes this line:
alarm[cursorPos] = alarm[cursorPos] > 0 ? (alarm[cursorPos]-1) : (timeUnits[cursorPos]-1);If the existing value for that unit stored in the alarm array is greater than 0, then it will simply decrement it; otherwise, it will be changed to the largest value for that value. For instance, if alarm[0] were set to 0, then it would be changed to 23.
Conversely, for increasing the values, it will go from the maximum value to 0.
ALARM
This is when the alarm is going off, as transitioned to from the IDL state
The backlight will flash between blue and white, based on these lines:
if(alarmStart + colorLen < millis()) {
    if ((colorLen / COLORLEN) % 2 == 1) lcd.setBacklight(WHITE);
    else lcd.setBacklight(BLUE);
    colorLen += COLORLEN;
}
colorLen is set to COLORLEN when the alarm is triggered in the IDL state. The backlight will change colour when millis() exceeds when the alarm started going off, with the colorLen offset added; each time colorLEN increments by COLORLEN. If it has been an odd number of incrementations the backlight will turn white, conversely for an odd number it will turn blue.
If the user presses the select button, the alarm will snooze for SNOOZELEN after updating alarmStart = millis() - to make it the five minutes of SNOOZELEN after pressing the button when the alarm goes off again.
It also sets snoozed = 1 and changes the state to IDL.
The alarm will switch off based on this statement:
if((buttons & BUTTON_LEFT) || alarmStart+ALARMLEN < millis())Therefore, it is when the left button is pressed, or when the alarm has been going off for ALARMLEN milliseconds - 30 seconds.
alarmed and snoozed are set to false as the alarm is off and it goes back to the IDL state.
Both snoozing and switching the alarm off set the backlight back to blue as it may still have been white from flashing.
Automatic Backlight
Within the loop, but outside of the switch statement, the backlight automatic switch off timer starting point is set, BLStart = millis(). BLStart is not set when it is in the the IDL state, as if it resting then you would want the backlight to switch off; it is set when the buttons are being pressed, as this is when the user is interacting with the device. The backlight will automatically turn off after BLIGHTLEN has been exceeded when it idle. The length of time before it switches off is defined at initialisation in milliseconds as one minute:
const unsigned long BLIGHTLEN = 60000;Also outside the switch is this line, which reduces the sensitivity of the buttons:
delay(25);Testing & Result Analysis
| Test Condition | Expected Result | Reality compared to Expectation |
|---|---|---|
| Connected power | To display the welcome message for three seconds | Test worked as expected |
| Waited for welcome message to end | Device starts in setting time state | Test worked as expected |
| On initial run, adjusted the time and then pressed select button | Goes to IDL state, then to SETALARM state | Test worked as expected |
| In IDL state and pressed left button, with alarm on | Alarm turned off | Test worked as expected |
| In IDL state and pressed left button, with alarm off | Alarm turned on | Test worked as expected |
| In IDL state and pressed up button | Change to time setting state | Test worked as expected |
| In IDL state and pressed down button | Change to time setting state | Test worked as expected |
| In IDL state and pressed right button | Change to alarm setting state | Test worked as expected |
| In IDL state and pressed select button | No change | Test worked as expected |
| In IDL state and waited one minute | Backlight turns off | Test worked as expected |
| Adjusting hours, time currently 00:00:00 & pressed down button | Time to change to 23:00:00 | Test worked as expected |
| Adjusting hours, time currently 05:00:00 & pressed down button | Time to change to 04:00:00 | Test worked as expected |
| Adjusting hours, time currently 05:00:00 & pressed up button | Time to change to 06:00:00 | Test worked as expected |
| Adjusting hours, time currently 23:00:00 & pressed up button | Time to change to 00:00:00 | Test worked as expected |
| Adjusting minutes, time currently 00:00:00 & pressed down button | Time to change to 23:59:00 | Test worked as expected |
| Adjusting minutes, time currently 05:00:00 & pressed down button | Time to change to 04:59:00 | Test worked as expected |
| Adjusting minutes, time currently 05:00:00 & pressed up button | Time to change to 05:01:00 | Test worked as expected |
| Adjusting minutes, time currently 23:59:00 & pressed up button | Time to change to 00:00:00 | Test worked as expected |
| Adjusting seconds, time currently 00:00:00 & pressed down button | Time to change to 23:59:59 | Test worked as expected |
| Adjusting seconds, time currently 05:00:00 & pressed down button | Time to change to 04:59:59 | Test worked as expected |
| Adjusting seconds, time currently 05:00:00 & pressed up button | Time to change to 05:00:01 | Test worked as expected |
| Adjusting seconds, time currently 23:59:59 & pressed up button | Time to change to 00:00:00 | Test worked as expected |
| Adjusting hours and pressed left button | No change | Test worked as expected |
| Adjusting minutes and pressed left button | Change to adjusting hours | Test worked as expected |
| Adjusting seconds and pressed left button | Change to adjusting minutes | Test worked as expected |
| Adjusting hours and pressed right button | Change to adjusting minutes | Test worked as expected |
| Adjusting minutes and pressed right button | Change to adjusting seconds | Test worked as expected |
| Adjusting seconds and pressed right button | Changed to idle state | Test worked as expected |
| Adjusting hours and pressed select button | Changed to idle state | Test worked as expected |
| Adjusting minutes and pressed select button | Changed to idle state | Test worked as expected |
| Adjusting seconds and pressed select button | Changed to idle state | Test worked as expected |
| Setting alarm hours, alarm currently 00:00:00 & pressed down button | Alarm time to change to 23:00:00 | Test worked as expected |
| Setting alarm hours, alarm currently 05:00:00 & pressed down button | Alarm time to change to 04:00:00 | Test worked as expected |
| Setting alarm hours, alarm currently 05:00:00 & pressed up button | Alarm time to change to 06:00:00 | Test worked as expected |
| Setting alarm hours, alarm currently 00:59:00 & pressed up button | Alarm time to change to 00:00:00 | Test worked as expected |
| Setting alarm minutes, alarm currently 00:00:00 & pressed down button | Alarm time to change to 00:59:00 | Test worked as expected |
| Setting alarm minutes, alarm currently 05:05:00 & pressed down button | Alarm time to change to 05:04:00 | Test worked as expected |
| Setting alarm minutes, alarm currently 05:05:00 & pressed up button | Alarm time to change to 05:06:00 | Test worked as expected |
| Setting alarm minutes, alarm currently 23:59:00 & pressed up button | Alarm time to change to 23:00:00 | Test worked as expected |
| Setting alarm minutes, alarm currently 00:00:00 & pressed down button | Alarm time to change to 00:00:59 | Test worked as expected |
| Setting alarm minutes, alarm currently 05:05:20 & pressed down button | Alarm time to change to 05:05:19 | Test worked as expected |
| Setting alarm minutes, alarm currently 05:05:20 & pressed up button | Alarm time to change to 05:05:21 | Test worked as expected |
| Setting alarm minutes, alarm currently 23:59:59 & pressed up button | Alarm time to change to 23:59:00 | Test worked as expected |
| Setting alarm hours and pressed left button | No change | Test worked as expected |
| Setting alarm minutes and pressed left button | Change to setting alarm hours | Test worked as expected |
| Setting alarm seconds and pressed left button | Change to setting alarm minutes | Test worked as expected |
| Setting alarm hours and pressed right button | Change to setting alarm minutes | Test worked as expected |
| Setting alarm minutes and pressed right button | Change to setting alarm seconds | Test worked as expected |
| Setting alarm hours and pressed right button | Changed to idle state | Test worked as expected |
| Setting alarm minutes and pressed select button | Changed to idle state | Test worked as expected |
| Setting alarm seconds and pressed select button | Changed to idle state | Test worked as expected |
| Setting the clock to 23:41:33 & the alarm to 00:00:00 | Alarm to go off at set time, saying “Good Morning” | Test worked as expected |
| Setting the clock to 02:03:04 & the alarm to 05:03:30 | Alarm to go off at set time, saying “Good Morning” | Test worked as expected |
| Setting the clock to 05:27:18 & the alarm to 11:59:59 | Alarm to go off at set time, saying “Good Morning” | Test worked as expected |
| Setting the clock to 03:44:20 & the alarm to 12:00:00 | Alarm to go off at set time, saying “Good Afternoon” | Test worked as expected |
| Setting the clock to 03:12:38 & the alarm to 16:20:00 | Alarm to go off at set time, saying “Good Afternoon” | Test worked as expected |
| Setting the clock to 01:20:56 & the alarm to 17:59:59 | Alarm to go off at set time, saying “Good Afternoon” | Test worked as expected |
| Setting the clock to 00:34:01 & the alarm to 18:00:00 | Alarm to go off at set time, saying “Good Evening” | Test worked as expected |
| Setting the clock to 00:20:56 & the alarm to 18:00:00 | Alarm to go off at set time, saying “Good Evening” | Test worked as expected |
| Set alarm and clock | Backlight to flash white and blue when alarm goes off | Test worked as expected |
| Pressing select button whilst alarm is going off | The display to stop flashing, revert back to telling the time with “Snoozing” below | Test worked as expected |
| Pressing left button whilst alarm is going off | The display to stop flashing, revert back to telling the time with “Alarm is off” below | Test worked as expected |
| Leaving the alarm going off for 30 seconds | The display to stop flashing, revert back to telling the time with “Alarm is off” below | Test worked as expected |
The device works as it was expected to and completes all of the required tasks; the boundary tests worked as intended.
Source Code
#include <TimeLib.h> // time library

// screen libraries
#include <Wire.h>
#include <Adafruit_RGBLCDShield.h>
#include <utility/Adafruit_MCP23017.h>

// backlight colours
#define OFF 0x0
#define RED 0x1
#define YELLOW 0x3
#define GREEN 0x2
#define TEAL 0x6
#define BLUE 0x4
#define VIOLET 0x5
#define WHITE 0x7

// states
#define IDL 0
#define SETCLOCK 1
#define SETALARM 2
#define ALARM 3

// cursor positions
#define HOURS 0
#define MINS 1
#define SECS 2

// default lengths of time  (in milliseconds)
const int COLORLEN = 200; // 200 milliseconds for the colours to flash during the alarm going off
const int ALARMLEN = 30*1000; // 30 seconds for the alarm to go off for
const unsigned long SNOOZELEN = 5*60000; // 5 minutes for the snooze
const unsigned long BLIGHTLEN = 60000; // a minute for the backlight to time off

// maximum for each unit of time (HH,MM,SS)
const int timeUnits[3] = {24,60,60};

//set initial state
int state = SETCLOCK, cursorPos = 0;
bool clockSet = 0, alarmSet = 0, alarmed = 0, snoozed = 0;

char string[16]; // to output to the screen

int alarm[3] = {8,0,0};
unsigned long alarmStart, colorLen, BLStart;

Adafruit_RGBLCDShield lcd = Adafruit_RGBLCDShield(); // LCD screen
uint8_t buttons; // buttons on LCD Shield

void setup() {
  Serial.begin(9600);
  lcd.begin(16, 2);
  lcd.setBacklight(BLUE);
  BLStart = 0;

  Serial.println("Start up message");
  lcd.setCursor(0,0);
  lcd.print("Welcome");
  lcd.setCursor(0,1);
  lcd.print("Set time & alarm");
  delay(3000); // show start up message for 3 seconds

  lcd.clear();
  setTime(0, 0, 0, 11, 04, 2016);
  Serial.println("Setting time state");
}

void loop() {
  buttons = lcd.readButtons(); // get buttons that are pressed

  if(state != IDL || buttons) { // keep screen on when pressing buttons or setting times
    BLStart = millis();
    if(state != ALARM) lcd.setBacklight(BLUE); // as alarm flashes backlight
  }

  if(cursorPos < 0) cursorPos = 0; // reset the cursor if it goes off screen (catching for setting time and alarm states)

  switch (state) {
    case IDL:
      if (BLStart+BLIGHTLEN < millis()) lcd.setBacklight(OFF); // switch screen off after a period of time
      if((hour() == alarm[0] && minute() == alarm[1] && second() == alarm[2] && alarmed) || (alarmStart+SNOOZELEN < millis() && snoozed)) {
        // time is the same time as alarm set or no longer snoozed
        state = ALARM;
        alarmStart = millis();
        colorLen = COLORLEN;

        Serial.println("Alarm state");
        lcd.clear();
        lcd.setCursor(2,0);
        if(isAM()) lcd.print("Good Morning");
        else if(hour() > 18) lcd.print("Good Evening");
        else {
          lcd.setCursor(1,0);
          lcd.print("Good Afternoon");
        }

        lcd.setCursor(0,1);
        lcd.print("Select to snooze");
        break;
      }
      cursorPos = 0;
      if ((buttons & (BUTTON_UP | BUTTON_DOWN)) || !clockSet) { // changing clock time or clock never set
        state = SETCLOCK;
        Serial.println("Setting time state");
        lcd.clear();
        break;
      }
      if ((buttons & BUTTON_RIGHT) || !alarmSet) { // changing alarm time or alarm never set
        state = SETALARM;
        Serial.println("Setting alarm state");
        lcd.clear();
        break;
      }

      if (buttons & BUTTON_LEFT) { // toggle alarm on and off with left button
        alarmed = !alarmed;
        snoozed = 0; // stop snoozing
        lcd.clear();
        Serial.println("Alarm toggled/stopped snoozing");
      }

      // output current time
      sprintf(string, "%02d:%02d:%02d", hour(),minute(),second());
      lcd.setCursor(4, 0);
      lcd.print(string);

      if (alarmStart+SNOOZELEN > millis() && snoozed) { // currently snoozing
        lcd.setCursor(4,1);
        lcd.print("Snoozing");
      }
      else if(alarmed) { // when the alarm is on, show the time it is set for
        sprintf(string, "Alarm:%02d:%02d:%02d", alarm[0],alarm[1],alarm[2]);
        lcd.setCursor(1, 1);
        lcd.print(string);
      }
      else { // let the user know the alarm is off
        lcd.setCursor(2, 1);
        lcd.print("Alarm is off");
      }
      break;

    case SETCLOCK:
      if (buttons & (BUTTON_UP | BUTTON_DOWN)) { // adjusting
        int adj = (buttons & BUTTON_UP) ? 1 : -1;
        switch (cursorPos) {
           case HOURS: adjustTime(adj*60*60); break;
           case MINS: adjustTime(adj*60); break;
           case SECS: adjustTime(adj); break;
        }
      }
      if (buttons & BUTTON_LEFT) cursorPos--; // go back to previous unit to change
      if (buttons & BUTTON_RIGHT) cursorPos++; // go to next unit to change
      if ((buttons & BUTTON_SELECT) || cursorPos > 2) { //finished changing time
        clockSet = 1;
        state = IDL;
        Serial.println("Idle state");
        lcd.clear();
      }
      else {
        // let the user know what they are updating
        lcd.setCursor(0, 0);
        lcd.print("Adjust ");
        switch(cursorPos) {
          case HOURS: lcd.print("hours  "); break;
          case MINS: lcd.print("minutes"); break;
          case SECS: lcd.print("seconds"); break;
        }

        // show the user the current time
        sprintf(string, "%02d:%02d:%02d", hour(),minute(),second());
        lcd.setCursor(0, 1);
        lcd.print(string);
      }
      break;

    case SETALARM:
      if(buttons & BUTTON_DOWN) alarm[cursorPos] = alarm[cursorPos] > 0 ? (alarm[cursorPos]-1) : (timeUnits[cursorPos]-1);
      if(buttons & BUTTON_UP) alarm[cursorPos] = alarm[cursorPos] < (timeUnits[cursorPos]-1) ? (alarm[cursorPos]+1) : 0;
      if(buttons & BUTTON_LEFT) cursorPos--; // change to editing previous unit
      if(buttons & BUTTON_RIGHT) cursorPos++; // editing next unit
      if((buttons & BUTTON_SELECT) || cursorPos > 2) { // finished editing alarm time
        alarmSet = 1;
        alarmed = 1;
        state = IDL;
        Serial.println("Idle state");
        lcd.clear();
      }
      else {
        lcd.setCursor(0, 0);
        lcd.print("Set alarm ");
        switch(cursorPos) {
          case HOURS: lcd.print("hour  "); break;
          case MINS: lcd.print("minute"); break;
          case SECS: lcd.print("second"); break;
        }
        sprintf(string, "%02d:%02d:%02d", alarm[0],alarm[1],alarm[2]);
        lcd.setCursor(0, 1);
        lcd.print(string);
      }
      break;

    case ALARM:
      if(alarmStart + colorLen < millis()) { // flash colours
        if ((colorLen / COLORLEN) % 2 == 1) lcd.setBacklight(WHITE);
        else lcd.setBacklight(BLUE);
        colorLen += COLORLEN;
      }
      if(buttons & BUTTON_SELECT) { // user chooses to snooze
        alarmStart = millis();
        snoozed = 1;
        Serial.println("Snoozing");
        state = IDL;
        Serial.println("Idle state");
        lcd.setBacklight(BLUE);
        lcd.clear();
      }
      else if((buttons & BUTTON_LEFT) || alarmStart+ALARMLEN < millis()) { // switch the alarm off after a period of time
        alarmed = 0;
        snoozed = 0;
        state = IDL;
        Serial.println("Idle state");
        lcd.setBacklight(BLUE);
        lcd.clear();
      }
      break;
  }
  delay(25); // make buttons less sensitive
}
Instructions
Welcome Message
When the device starts you will read this message:
Welcome
Set time & alarm
for three seconds, then you will enter the menu to adjust the clock.
Adjust clock
To start off the display will read:
Adjust hours
00:00:00
From here you can increment the selected unit of time, using the up and down buttons, and change the unit by pressing the left and right buttons - it will display Adjust minutes or Adjust seconds.
Within this menu you are changing the clock - so decrementing a unit below zero will cause the time to cycle round. For example, from a starting display like this:
Adjust minutes
04:00:00
Pressing the down button once will result in the display showing:
Adjust minutes
03:59:00
This should be fairly intuitive as this is how analog clocks are set.
Once you are satisfied with the time you have set for the clock, press the select button to continue. Alternatively, you can press the right button after setting the seconds.
If you are setting the clock for the first time, you will then progress onto setting the alarm, otherwise you will return to the clock.
Setting the alarm
To start off the display will read: (or whatever you have previously set it to)
Set alarm hour
08:00:00
This does not work in the same way to adjusting the clock - you are simply changing the value for each of the units of time. This should feel logical, as generally you know the time you want to set the alarm for and this way you can get to it quickly.
Nonetheless the interface is the same - left/right to select the unit you are changing, and then up/down to change it. For example:
Adjust alarm minute
04:00:00
Pressing the down button once will result in the display showing:
Adjust alarm minute
04:59:00
Again, once you are satisfied with the alarm time, press the select button, or press right after setting the alarm time seconds1, and you will go to the clock.
Clock
By default the clock screen will simply display:
   00:00:00
Alarm:08:00:00
With the current time displayed at the top and the alarm time you have set at the bottom.
If you don’t press any of the buttons then you will see the clock display updating and the backlight will turn off after a minute. To turn the backlight back on, press the select button.
To toggle the alarm on and off, press the left button. Also, to stop snoozing, press the left button.
To adjust the clock, press the up or down buttons.
You can change the alarm time by pressing the right button.
When the alarm goes off you will see the alarm going off.
Alarm going off
The backlight will flash and the display will say something like:
  Good Morning
Select to snooze
You can turn the alarm off by pressing the left button and you will return to the clock. After 30 seconds the alarm will automatically switch off and it will revert back to the clock.
To snooze the alarm, press the select button. This will take you back to the clock, but the display will looks something like:
   04:00:00
   Snoozing
After five minutes, the alarm will go off again and you can either turn it off, let it end after 30 seconds, or snooze it.
- There may be issues pressing the right button after setting the alarm seconds, as when the clock is idle, pressing the right button enters the setting the alarm menu again, so it may seem that it has performed incorrectly. To be safe, just use the select button, or only shortly press the right button. ↩